

Your super online
Your Member Online guide
With just a few clicks, you can manage your super like a pro.
This guide will walk you through the key features of Member Online, like checking and changing your investments, nominating your beneficiaries and finding and combining other super accounts.
Having trouble getting online? No worries, here’s some help to get you back in control.
How to find and combine your super
Losing track of your super is easy to do, especially if you change jobs or move house. The good news is, it's easy to find and combine super accounts through Member Online, all in just a few steps:
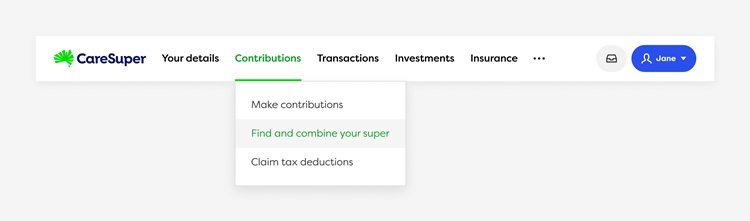
1. Log in to Member Online
Log in to Member Online and head over to the ‘Find and combine your super’ tool, located under the ‘Contributions’ section in the top navigation. And don’t worry – there’s no obligation to combine anything after your search.
2. Start your search
Choose how you’d like to find your other super. You can search using ATO records, or enter your other fund details if you already have them. To use the ATO search, have your ID ready.
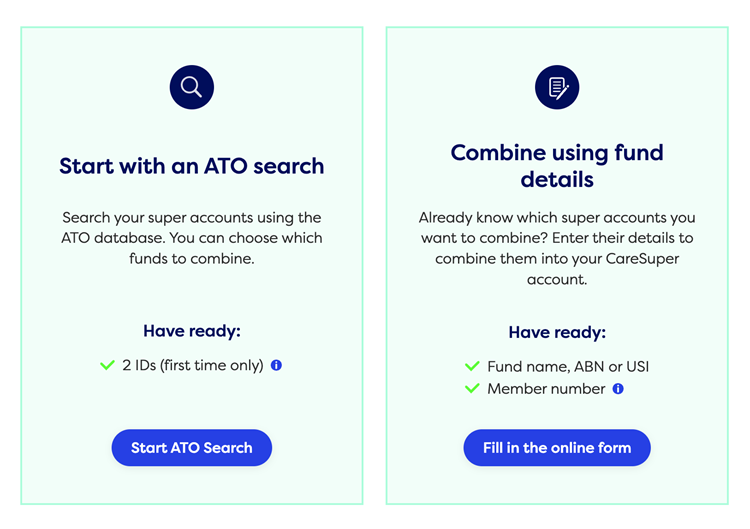
Tips for ATO search
To verify your identity, please have at least two of the following ready: Australian driver’s licence, Medicare card, or Australian passport.
Tips for combine using fund details
Member number is your unique membership ID with the other fund(s). Some funds may call it Account number, Account ID, Client ID, or Member ID. If you have multiple numbers, use the one that uniquely identifies you as a member.
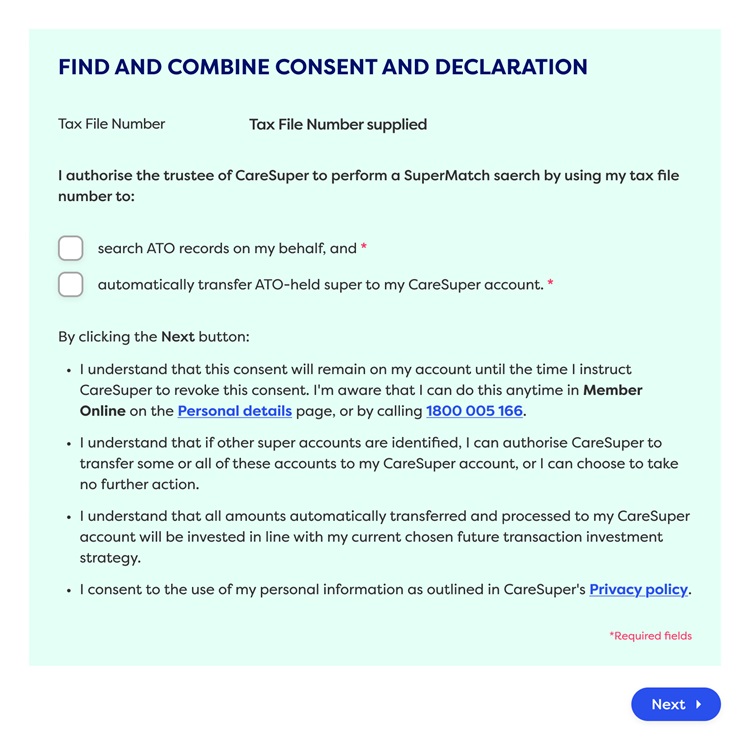
3. Give your consent
If you start with an ATO search, you’ll be asked to provide your consent so we can check ATO records on your behalf. We’ll then search for any super held with other funds or by the ATO, and you can choose which accounts to transfer to your CareSuper account.
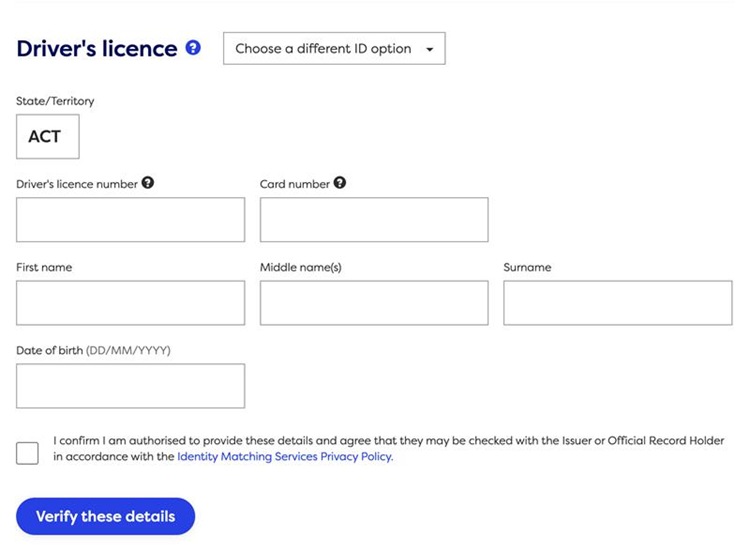
4. Verify your identity
Next, you’ll need to verify your identity—so, have two pieces of ID handy.
5. Authorise
For added security, you’ll need to authorise the process via your mobile number.
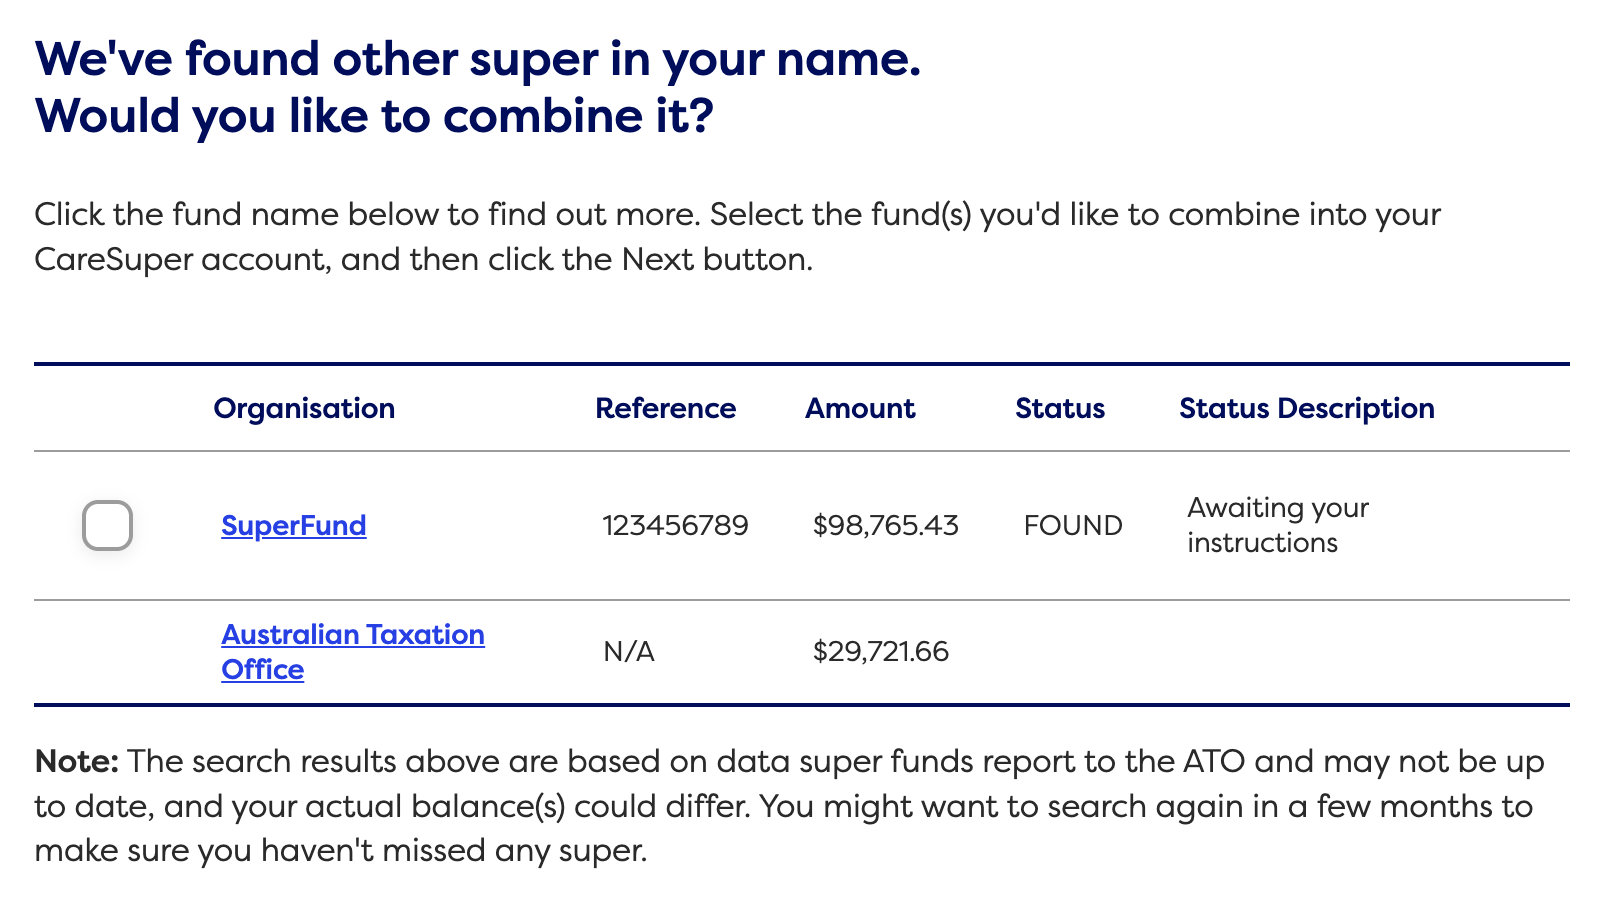
6. View your super accounts
Once your identity is verified, you’ll be able to view other super accounts linked to your name.

7. Review account details
You can then click on the fund name to view more details, including whether your other accounts have insurance. Just be aware that transferring your super to CareSuper will result in losing any insurance you have with your other fund.
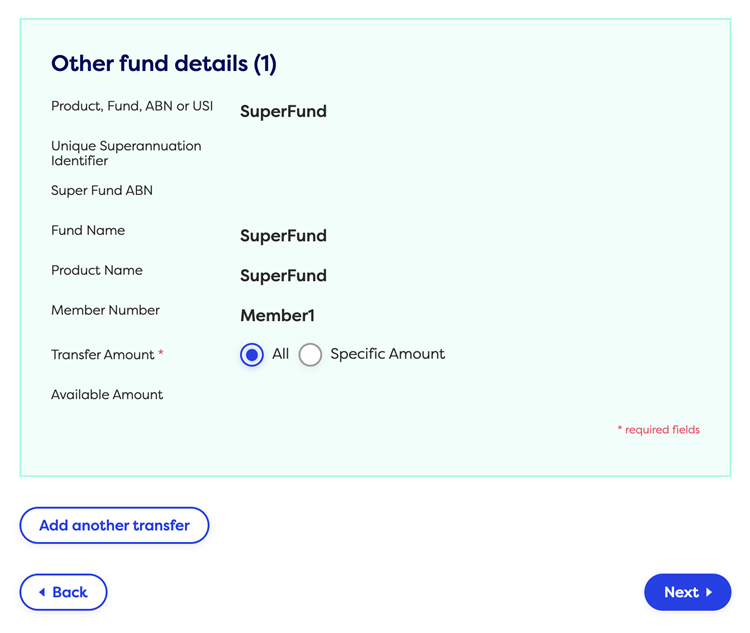
8. Select and combine
If you decide to proceed, select the super accounts you’d like to combine into your CareSuper account, then click ‘Next’. Be sure to read the important information and declaration before you submit. We'll then take care of the rest.

Don't want to combine your accounts?
No problem, you don't have to proceed., click Click ‘back’ to return to your Account Summary page.
9. Confirmation
Finally, you’ll receive confirmation that your request has been submitted, along with a transaction reference number. Your super should be transferred into your CareSuper account within 3 working days. We'll let you know once the money is in your account.
There may be delays if your other fund needs to check your ID. If you haven't heard anything within 10 working days, contact your other fund.


Combine your super
How to view and manage your super investments
Your super is your future, so it’s worth knowing how it’s invested. To view and change your investments, follow these steps:
1. Log in to Member Online
Log in to Member Online and click on ‘Investments’ in the top navigation.

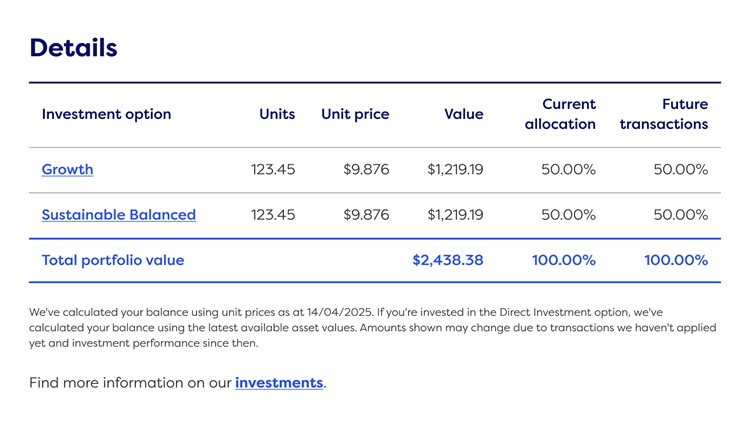
2. View your investments
You’ll be taken to your investment table, which shows unit price, value, current allocation and future allocation of your super.
3. Explore your investment options
Picking the perfect investment mix can make a big difference in how your super savings grow. Check out the different investment options available to you, and if you decide to make a switch, simply click on the ‘Change my investments’ button.

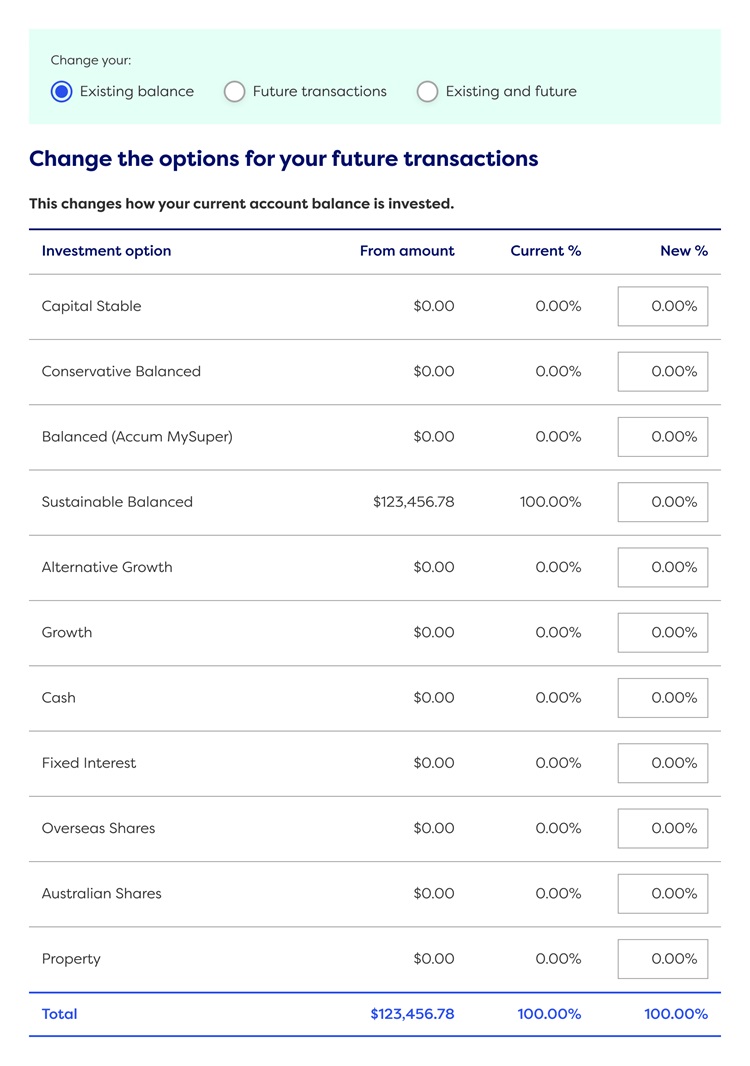
4. Change your investments
Here you can change the investment of your existing balance, future balance, or both. Enter your new percentages, making sure they add up to 100%, and click ‘Next’.
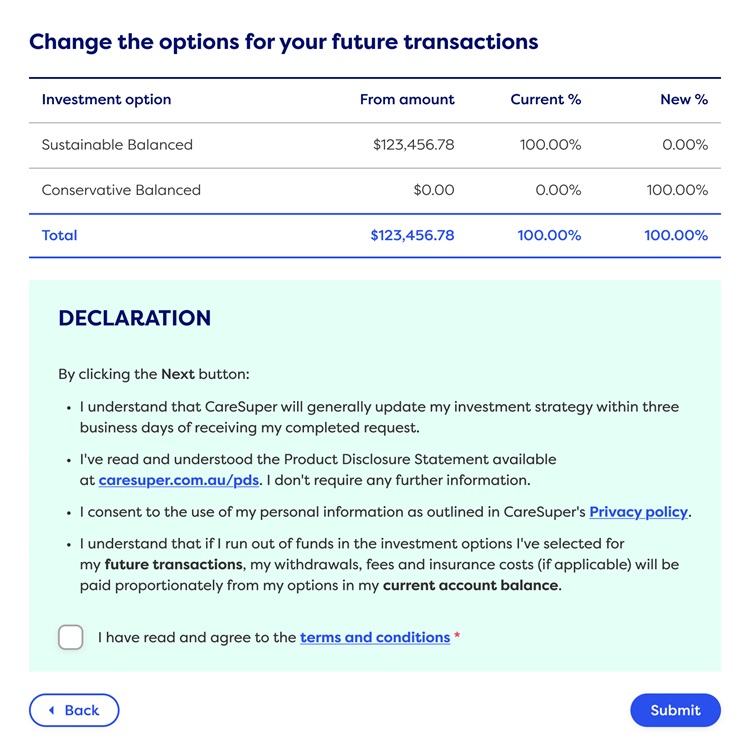
5. Confirm and submit your changes
Next, you’ll see a summary of your changes, including the effective date and a declaration.
Please read the declaration carefully and once happy, tick and submit!
6. Check your inbox
Finally, don’t forget to check your inbox for a confirmation email.


We're here to help
How to nominate or update beneficiaries online
Nominating a beneficiary gives you peace of mind and helps protect your loved ones. Find out how it works and who you can nominate to make the best decision for your situation.
To view and update your beneficiaries, follow these steps:
1. Log in to Member Online
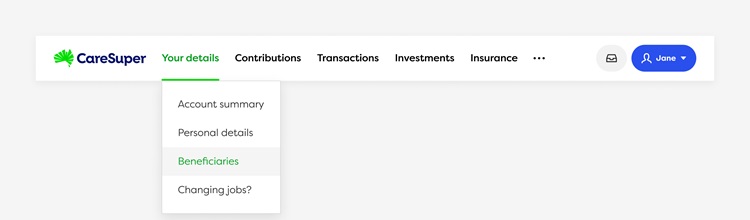
Log in to Member Online and click on the ‘Beneficiaries’ option under ‘Your details’ in the top navigation.
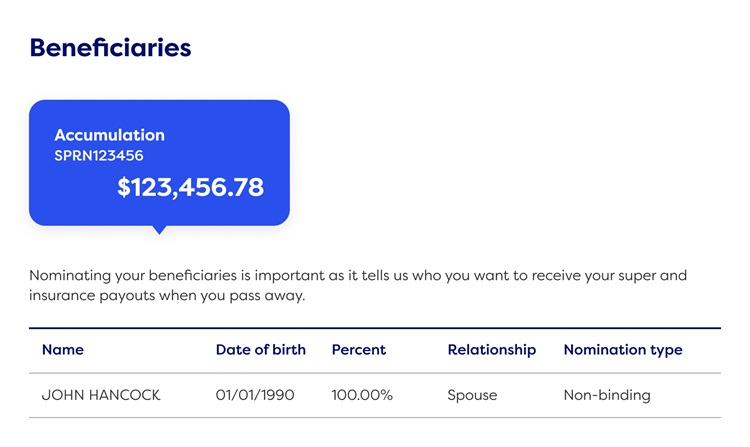
2. View existing beneficiaries
You’ll be directed to your beneficiaries screen, where you can see any existing nominations.
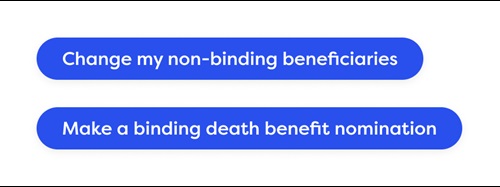
4. Choose your type of beneficiary nomination
To nominate a non-binding beneficiary, click the corresponding button. If you'd prefer to nominate a binding beneficiary, you can download our pre-filled form by selecting the ‘Make a binding death nomination’ button.
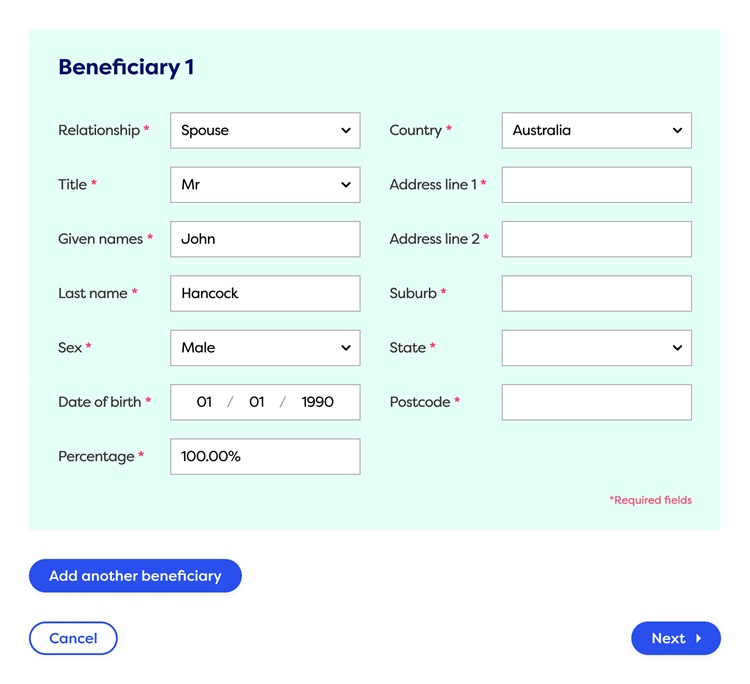
5. Complete the nomination
To nominate a non-binding beneficiary, fill in the required fields. You can add more than one beneficiary if you wish but remember that the total allocation must add up to 100%. Once complete, click ‘Next’.
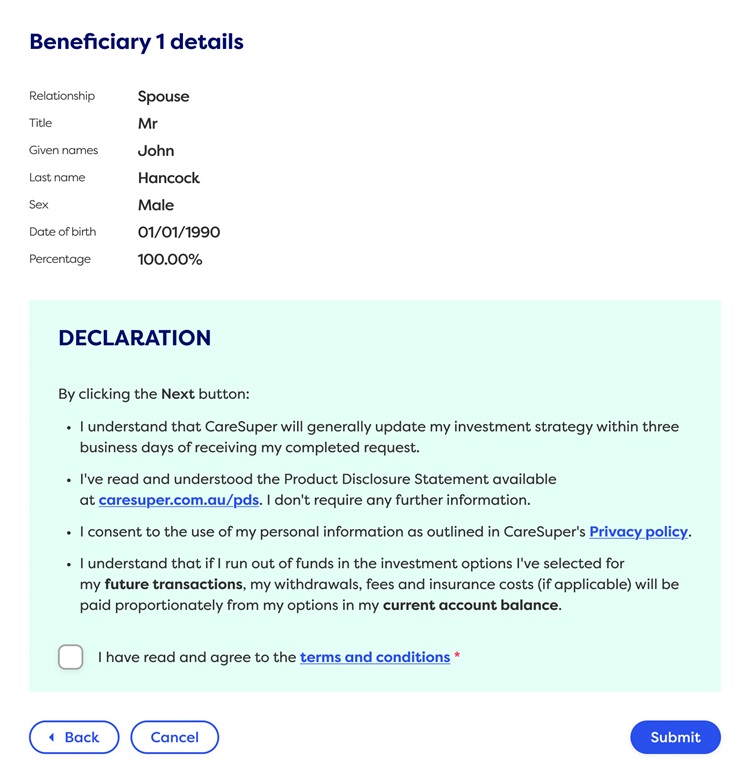
6. Review and submit your nomination
Review your nomination and declaration and, when you’re happy with the details, click ‘Submit’.
7. Check your inbox
Finally, don’t forget to check your inbox for a confirmation email.

